G-POST, Photography
AUSSIE OVERLANDERS : NIGHT PHOTOGRAPHY
HELLO + WELCOME to an extra special post as we drive from Sydney to London, via the East coast of Africa. This post today is all about the trials and tribulations of night photography and trying to create those perfect images. Recently I have been enjoying practicing my night photography and I really want to share some of the tips I have learnt along the way.
![]()
It is G here today and I want to talk to you legends out there about a passion of mine. Photography. I love taking photos and some of my favourite photographers were mentioned previously.
Since that time I have read lots of books and taken a little over 20 000 photos. I have also had the time to practice. And that is what it takes. PRACTICE + EDUCATION. Educate yourself about the functions of your camera. Read what the experts do and then apply it to your own skills and knowledge.
That’s what I have done and I can look back on some old pics of mine and actually see that I HAVE improved.
I shoot with a Canon 6D. I like Canon and it has always been my camera of choice. It was the lightest full frame camera available at the time and I see now it has dropped considerably in price. It has been brilliant. All of the images below are taken with a Canon 14mm Prime Lens attached to the 6D body.
![]()
TOP TIPS
– READ about photography. Read a lot!
– PRACTICE as much as you can. Take your camera with you everywhere.
– INVEST in some garry good gear. Not necessary, but it WILL help improve the quality of your images.
– LEARN about the process of shooting RAW images. Not vital but it does help when post editing. A downfall is that shooting in RAW takes a lot of storage space. The files are massive.
– USE a photo editing program like Lightroom or Adobe Photoshop.
– REMEMBER that all those quality images you see online, in magazines and on the TV have more than likely been edited. It’s not cheating. Be comfortable in saying that you edit your photos, it’s what the pros do.
– PLAY around with your editing programs and find a style of image that suits you. I’m still working on this.
– LISTEN to tutorials online about your chosen editing software program. LEARN how to use the software.
– Have lots of FUN and keep on practicing.
![]()
The evolution of my photography has been fun. I am not saying that ALL of the photos I put up online are great but I love to practice so I don’t really care.
When playing around with your camera, remember that it doesn’t matter if the bloke next to you doesn’t like your final image. If you are happy with it then keep going. You can take hints on how to improve your photography but you will not always please everyone with your images. As long as you like the final product then who cares.
Below I have put together a few examples with pre and post edit images to show you the power of good quality gear and editing software.
![]()
ROLLING CLOUDS
This image was a little under exposed. When you shoot in RAW, the files tend to come out a bit flatter and post editing is required to enhance the image. I popped the colours, increased the clarity to highlight the clouds and stars. Check the screen grab for more details. Focus on the brightest object OR the thing you want to be in focus and your image should come out crystal clear. You can also switch your camera over to LIVE VIEW (on a Canon), then Auto Focus to focus on your subject, then back to manual focus before you take the final image. Try it.
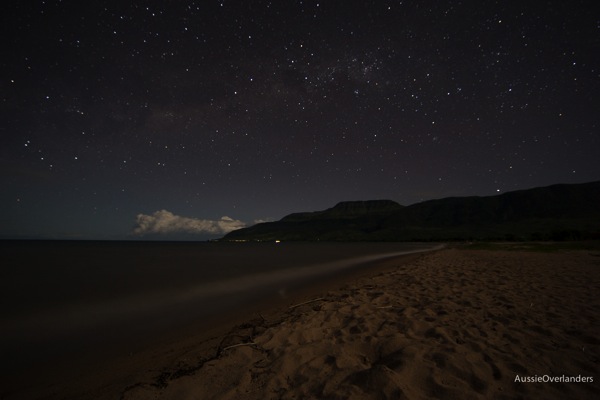
:: Rolling Clouds pre-edit {iso1000 – 29.9 sec – f 2.8 – RAW file}
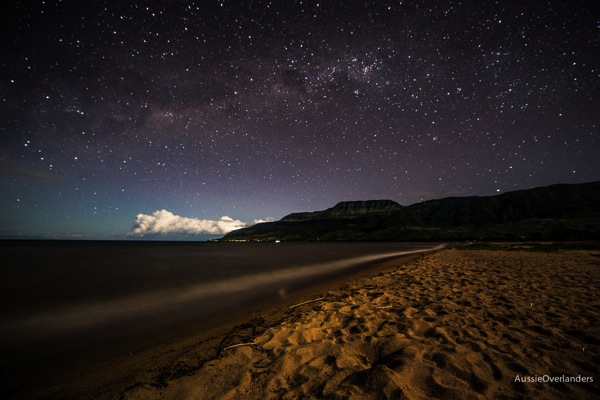
:: Rolling Clouds post-edit {iso1000 – 29.9 sec – f 2.8 – processed into a JPEG and sized for our website}
![]()
SATELLITE DISH
This image along with a bright moon, has some heavy light coming in from the right hand side. But I kinda like it. Some people may like the original file better than the processed one but as an example I have played with it a little bit.
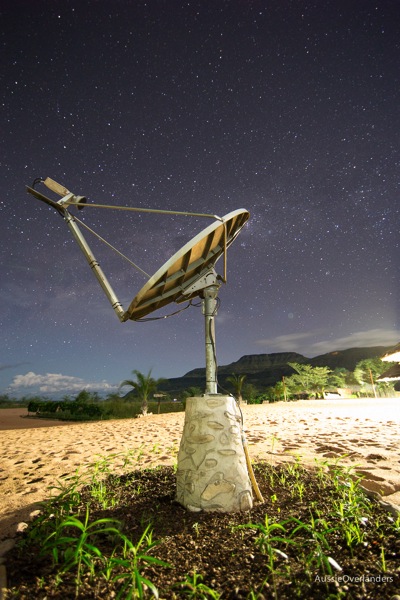
:: Satellite Dish pre-edit {iso3200 – 29 sec exposure – f2.8 – RAW file}
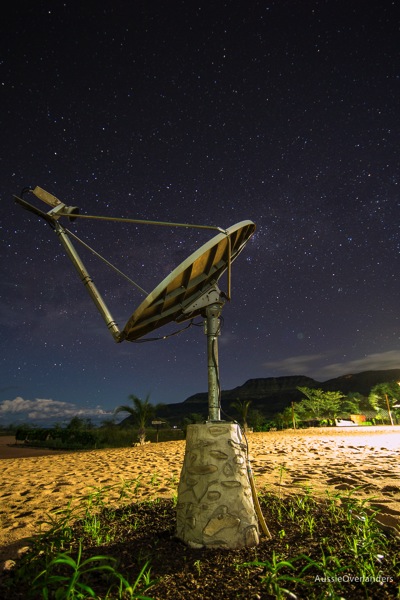
:: Satellite Dish post-edit {iso3200 – 29 sec exposure – f2.8 – processed into a JPEG and sized for our website}
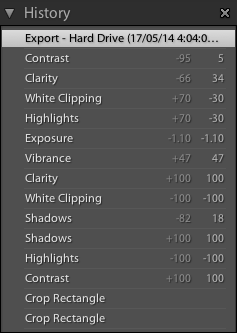
:: Lightroom editing history
![]()
STAR TRAILS ON LAKE MALAWI
The image below was the last one taken of the night. My first ever attempt at star trails. It turned out ok but not as sharp as I would have liked. The moon was bright which is not optimal and eventually after nearly ten minutes with the shutter open, the battery died.
Post edit completed in Lightroom 5 – Removed the chromatic aberration (Google it,) popped the colours, increased the clarity and lightened the shadows. If you are familiar with light room check the screen grab below.
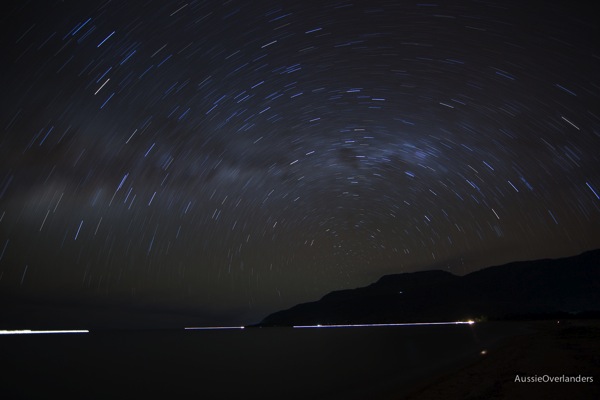
:: Star trails pre-edit {iso100 – 972 sec exposure – f2.8 – RAW file}
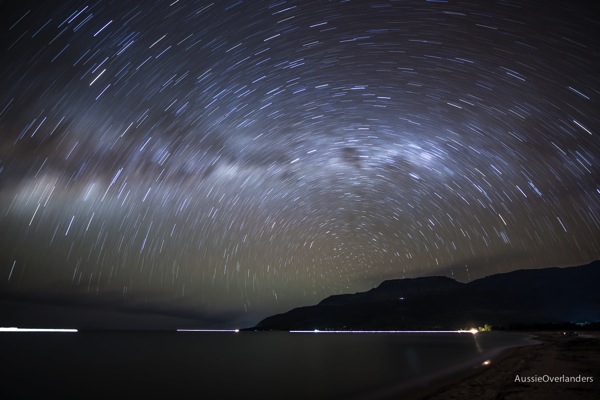
:: Star trails post-edit {iso100 – 972sec exposure – f2.8 – processed into a JPEG and sized for our website}
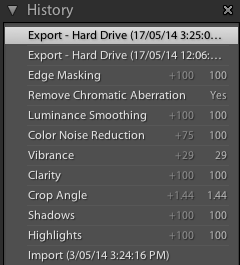
:: Lightroom editing history
![]()
FARM HOUSE
The Farm House image looks good in both I reckon. I like the silhouette of the first one but I also like seeing more detail in the second image. To show you the power of post editing I have created the second image. What do you think?
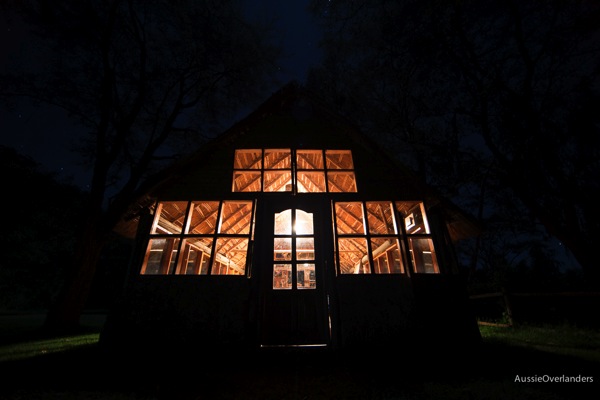
:: Farm House {iso100 – 30 sec exposure – f2.8 – RAW image}
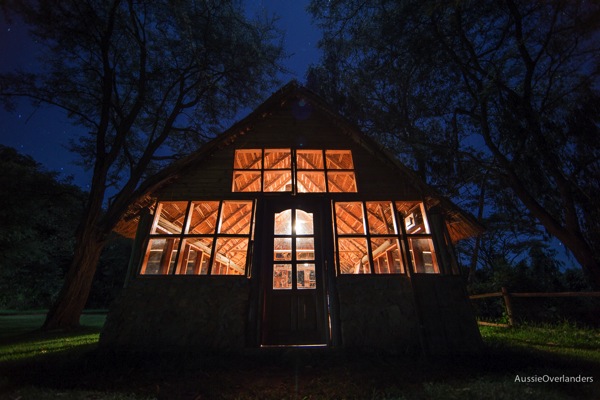
:: Farm House {iso100 – 30 sec exposure – f2.8 – processed into a JPEG and sized for our website}
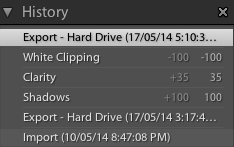
:: Lightroom editing history
![]()
Well thanks for tuning in guys.
I hope you have enjoyed this post. Hopefully you can apply some of the stuff I have learnt in your own lives. Let me know in the comments box how you go.
I love the fact that you are here with us in spirit. Sometimes life on the road can be pretty ordinary and with your comments and positive vibes it helps us get through those tough days. Respect!
Cheers,
![]()
![]()
![]()


thanks for these really great tips Gareth. You are a star! Any chance of posting the lightroom editing history for the first image? 🙂 🙂
Cheers Bridget! I’ll let G know you what you want
Kx
Excellent info, shooting evening shots is one of the hardest things to do. This will definitely help me.
That’s awesome Mike! We were just writing about you guys the other day and your awesome blog here 🙂 http://aussieoverlanders.com.au/overlanders-we-meet/